Creating LiveCubes
Generating a LiveCube using Exporters
Please visit the Export Plugins page to learn how to use each exporter.
Creating a Standalone LiveCube
 Sculpt the terrain using the
Terrain and Ocean tool.
Sculpt the terrain using the
Terrain and Ocean tool.
- Change the terrain type by choosing a different terrain using the Load Terrain feature of the Terrain and Ocean tool and modify the ground materials by painting a new material.
- Modify the atmosphere by using the Sun and Atmosphere settings.


 Add buildings, plants, people and
other objects that are furnished with the product by selecting the appropriate
icons on the interface.
Add buildings, plants, people and
other objects that are furnished with the product by selecting the appropriate
icons on the interface.
 You can import other objects that
you have by selecting the Import Objects icon on the Add Misc menu.
You can import other objects that
you have by selecting the Import Objects icon on the Add Misc menu.
Scene settings can be changed and objects can be moved and resized as you work. Scenes can then be saved as a LiveCube from the File menu.
LumenRT Exporter User Interface
The LumenRT Exporter utilizes a very simple graphical user interface that is universal across all CAD, CG, GIS applications and all supported 3D model format platforms. the exporter interface is accessed directly inside each system via a menu or icon selection. Please refer to the Export Plgins section for further information on the operation of each export plugin.
SketchUp Immersive nature Component Library
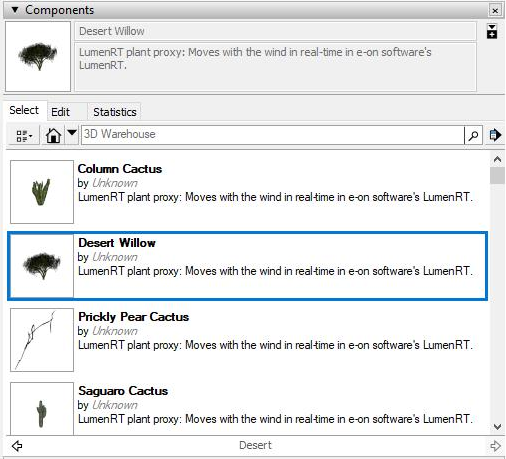
To access LumenRT content in Sketchup, open the SketchUP Components window and navigate to the LumenRT folder. Placing LumenRT items in a model accomplished in the same manner as placing any SketchUp component - by dragging the item into the scene and using the standard SketchUp position, rotate and scale tools to orient the item.
MicroStation Immersive Nature Cell Library
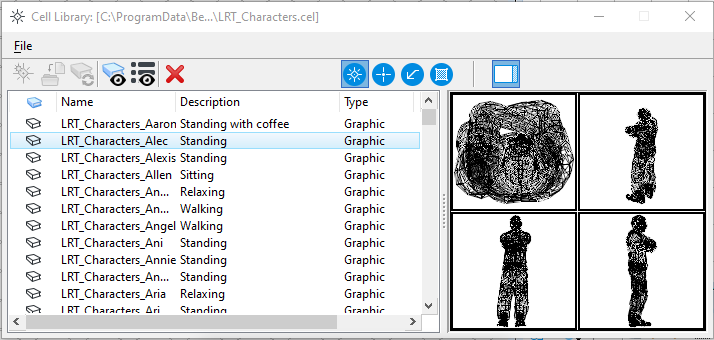
In MicroStation, LumenRT content is formatted as a MicroStation cell library. To load the library, click theLumenRT Load Library icon found on the LumenRT MicroStation taskbar. After the library is loaded, you can access individual content elements by going to Element / Cell. To place an item, select and drag it into the top view. By default, all LumenRT content is oriented in the MicorStation top view. Of course you can add content in any view by hitting the "T" for top view key which will re-orient the content item for whatever view you happen to be working in.